Sunday, May 8, 2011

albumen

The albumen process was invented in 1850 by Louis Desire Blanquart-Evrard. It was the first time that producing a print on a paper base from a negative became commercially exploitable. This resulted in its popularity for use as the method for printing the carte de visit, a trend in the mid 19th century of buying and trading small prints of friends, family, and famous persons. The print has a slight gloss which contributed to its appeal and made it unique in comparison to other processes of the time period.

The process involves an emulsion made of egg whites and salt, which the paper is dipped into and then dried. Before exposing, the paper is dipped in a solution of silver nitrate and water which activates the emulsion and allows the paper to become light sensitive. After drying again, the paper can be exposed to UV light with a negative in order to produce the image. The result is a brown colored print.
The fixing process involves Herschels standard fixing method involving solutions of hype and a rinse of water.

My experience: Following the same methods as the traditional recipe calls for, we coated the paper, hung it to dry, activated the emulsion, and exposed the image for a few minutes outside. The final result was a brown image with relatively wide tonality range and a slight gloss. We had trouble with the double coating, so my image only had one coat of albumen which had a less noticeable gloss than some of those that had two coats.
The process is also outlined in a previous blog entry


cyanotype


The cyanotype process was invented by Herschel in 1842, mainly as a means to reproduce notes and diagrams. The process was published as a last minute addition to another larger paper he had written. Herschel came across the process while experimenting and corresponding with a friend, Alfred Smee, a chemical correspondent to the Bank of England who had taken some interest in photography. Originally not very successful because of the limited tonal range and Prussion blue color, the process did not really become as popular until its success in the 20th century.

The process made Anna Atkins somewhat famous and gives her the title as the first female photographer when she used the process to photograph a series of British seaweeds, compiling them into a book entitled British Algae.


The coating solution is made up of two separate solutions which are mixed
Mixing cyanotype chemicals
together before coating the material. Solution A is made up of 25 grams of Ferric ammonium citrate and 100mL of water. Solution B is 10grams of Potassium ferricyanade and 100mL of wawater. Equal quantities of each solution are then mixed together in a third container, but need to be used with about a half hour because the solution does not last very long once mixed.
After evenly coating the paper and allowing it to dry, a negative can be placed over the paper and both should be exposed to UV, light generally natural sunlight. Depending on cloud coverage, number of coats, and the density of the negative, the exposure can take from a few minutes up to an hour. The paper should be exposed until the image looks as if it is getting lighter instead of darker and the blue is starting to fade. This is one of the longer process for exposure.
Fixing the image is as simple as running water of the paper for several minutes until the residual chemicals are removed. This simple fixing method that does not require the use of hypo is another reason for the popularity of the cyanotype.

The cyanotype "became the most commercially successful of all of Herschel's processes; indeed, it is the only process from the first decade of photography to survive in active use well into the twentieth century..." Mostly used for acrchitectural blueprinting, the cyanotype process has become a craft project and exciting way for amateur image makers and everyday creative persons to express themselves using such a cheap and simple method. Cyanotype fabrics with the high contrast of white shapes over the deep blue are a stunning way to transform fabric into a work of art. This set of chair seats and pillow cases is an example of such innovation.


My experience:
After preparing solutions A and B and mixing the two together in a separate container, 100% rag paper was coated with the green colored solution and then allowed to dry. We then applied a second coat and also let it dry.
I had two different negatives so both images were brought outside with the negative ink side facing the coated side of the paper. It was a very sunny day, but the cyanotypes still take a long time to expose so we were outside for about 20 minutes until the blue of the images started to fade.
The images were then fixed by running them under water for about five minutes. I left one image just as was, with only the water fixative:
For the other print, and two strips that i cut off of it, I used the other three toning solutions. The first was soaked in a mixture of tea and water, which was supposed to produce a darker blue effect. The strip I put in that solution was already pretty dark blue so it did not really have much of an effect.
I soaked the actual print in the tea solution first, and the strong bleach solution which resulted in a brownish tone, but I did not really like the final result.
The other strip was soaked in the weak ammonia first, and then in the tea solution. This was supposed to result in a blue-yellow tone, but I did not really achieve that result and instead ended up with a faded blue color.


2nd toner, 3rd toner, 1st toner.


Friday, May 6, 2011

Vandyke Brown


The vandyke brown print was invented by Herschel in 1842, getting its name from the print color's similarity to the deep brown pigment painter Van Dyck was known to use. The process is quite simple and is very similar to the first iron-silver process, the argentotype, which was also invented by Herschel and gave him credit for being the first to form an image with an iron sensitizer. "Both utilize the photosensitivity of iron salts as well as the ability of ferrous ions [iron(II)] to reduce silver ions to silver metal." The vandyke process is essentially his perfection of the argentotype.

The formula for the process is as follows:

        Solution A
        Ferric Ammonium Citrate 9.0 gm
        Distilled Water 33.0 ml

        Solution B
        Tartaric Acid 1.5 gm
        Distilled Water 33.0 ml

        Solution C
        Silver Nitrate 3.8 gm
        Distilled Water 33.0 ml

Combine Solutions A and B and slowly add C while stirring. Pour the sensitizer in a brown bottle and let it age for a few days before using. Keep it stored in a dark place. I keep mine in a covered box. I have used sensitizer that had been sitting around for a year or so and it was fine. Care should be taken when mixing.

After evenly coating the paper and allowing it to dry, the negative and coated paper should be exposed in UV light (the sun), depending on cloud coverage, density of the negative, and number of coats of emulsion, this could take only a couple of minutes, or ten to fifteen.

After exposure, the image will darken greatly once it has gone through the fixing process, and will darken even more once it has dried.

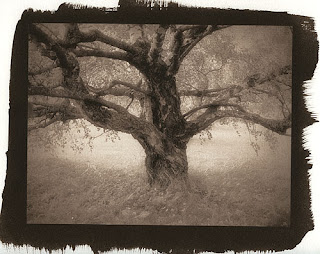
Path to Odaru, Kawazu, Izu, 12/26/89"Prints are immersed in water and then checked to make sure that there are no bubbles on the surface. They are then transferred to the reducer and agitated until the desired density is achieved. Reduction seems to be most pronounced in the lighter areas so great care must be taken to avoid wiping out delicate highlight details. This reducer has a tendency to increase overall contrast. After reduction prints are treated in a hypo clearing agent for three minutes and then washed for thirty minutes."

The process is relatively low in cost, making it quite popular, and one can achieve different tones by adding Kodak Polytoner, gold selenium, sepia, berg Copper, or Berg Blue in order to achieve purples, pinks, and blues. Unfortunately the downside to vandyke prints is that they are prone to fading after prolonged exposure to UV light.

"I was first drawn to the Vandyke process when I became dissatisfied with the lack of variety and character of the baryta base of conventional gelatin-silver photographic papers. I wanted to make prints on some of the many beautiful and interesting papers that are available to printmakers and watercolorists and first worked with salted paper but with limited success and considerable frustration."

My experience:

Our solution for coating the paper was mixed beforehand so that it could sit for a few days as the formula calls for. after coating the 100% rag paper once and allowing it to dry, the coated paper was brought outside with the negatives.
I used one cyanotype negative and one salted paper negative. It was an overcast day, so we stayed outside for about fifteen minutes in order to allow the images to properly expose.
We then brought them inside to be fixed, starting with a rinse of water and citric acid for five minutes, running water for about two minutes, a 3% hypo mixture for one minute, and then another minute in another batch, concluding with a final wash in water for about 40 minutes.

The resulting prints were in fact darker once they had dried, and they definitely showed a wider tonal range than some of the other processes, such as cyanotype.